Leaves

Until recently I did not realize how many different types of leaf photographs I had. Leaves are fascinating. They bud in the spring and are a lively green; then in the fall, they change to reds, yellows, and oranges. Structurally, leaves have veins, stems, and are textually interesting. I love to bring that texture forward in my photographs.


I had posted the above before and after in my post “Creativity: Where Does it Start?” I had transformed the ordinary palm leave to be viewed “differently”. I feel as a photographer it is my job to challenge our view of reality from time to time. The processing I chose for this image changed the color as well as the perspective of the image. It also highlighted the details in the leaf and stem.


On the left you see the original image of the green leaves. I liked how the light was hitting the leaves and felt there was a “photograph” somewhere in this image. I began using my crop tool and started dragging it around the image until I settled on a crop I thought was pleasing to the eye. There was so much going on in the original photograph that I needed to isolate a section. I then converted it to black and white. The tonal range of the image worked well with that choice. I then finished my editing in On1 Effects to add texture and to bring out the details in the leaves.


The above sycamore leaf was taken with my Sigma 120 – 300 f/2.8 zoom. I removed the lower right stem with the patch tool in Photoshop, then edited the color and texture in On1 Effects. The transformation was just what I wanted.
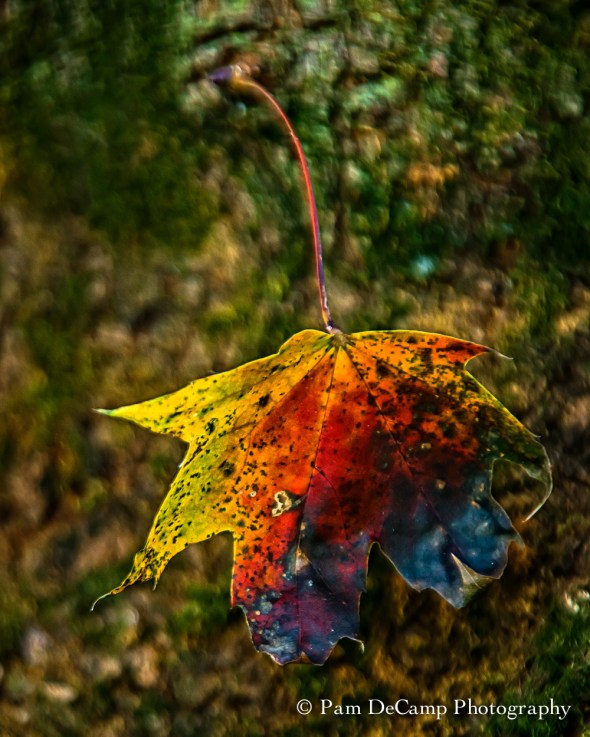
Maple Leaf
I was trying out my Tamron 28 – 300 f/3.5 – 5.6 and captured this leaf hanging off of my maple tree. I was exploring for things to photograph with the lens as I had just purchased it from KEH. I brought out the texture and details using On1 Effects. The sharpening tools in On1 Effects does a great job bringing out the details in images.
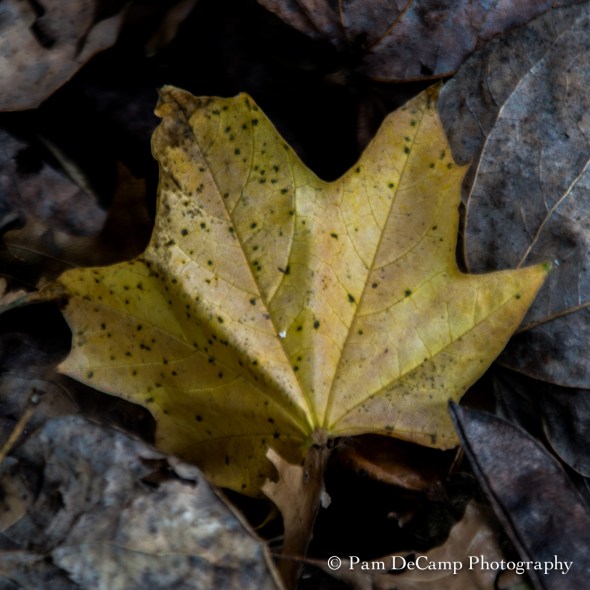
Maple Leaf
This was another leaf I was practicing on with my Tamron 28 – 300 f/3.5 – 5.6. It was a single color leaf among the dry gray and brown leaves. It caught my attention while walking around my patio.
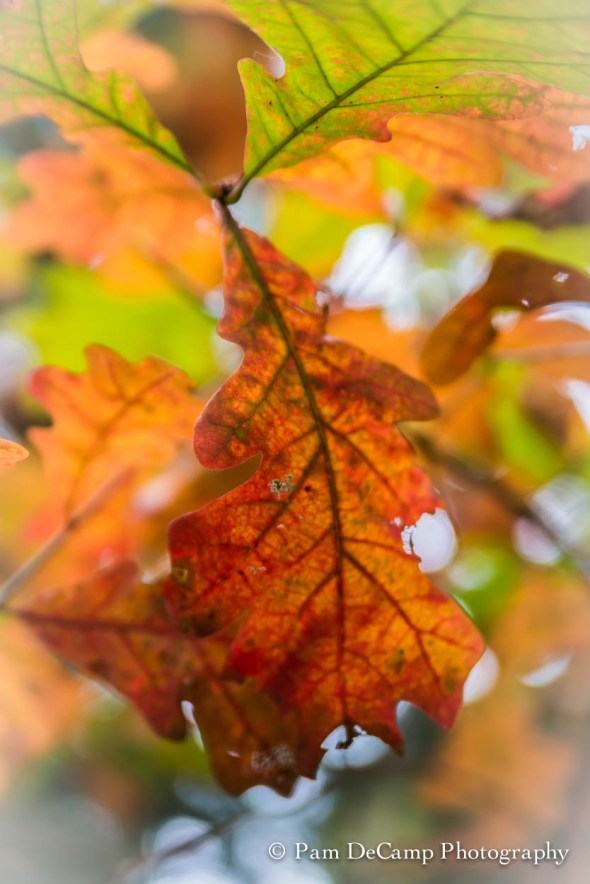
Oak Leaf
I spotted the oak leaf while walking around William and Mary College’s Campus this fall. While the image itself is a little soft, I enhanced that softness by decreasing the clarity. The colors are very vibrant. I added a soft white vignette to make the leaf stand out.


Above are a few of my other leaf images I have captured over the last year. I hope you enjoyed exploring the world of leaves! Effects 10 is available as a free download!

Focus Stacking

Image Created Using Focus Stacking
I decided to try focus stacking. Focus stacking is when you take a series of images and you focus on one section of the image at a time, then save them as PSD images. The key is to have your camera on a tripod so you do not change position.
Open the images then go to File>Scripts>Load Files into Stacks. After you stack the files you go to Edit>Auto-Blend-Layers.
The image will be in focus throughout.
This was fun to try. I will have to try it again sometime.
Refraction of Light in Photography


I saw a Facebook post on group site I participate in about refraction of light. The images were very interesting. I decided to put together a few items for our camera club to use at a future meeting.
If you google refraction of light you come back with a lot of scientific information. However when you google refraction of light in photography a lot of nice images appear!
With help from a friend of mine, I put together several backgrounds; some had color some were black and white. I purchased scrapbooking paper and used double stick tape and old scrap mats to mount the paper to so they would not bend.


Using a pole lamp with 3 lights to light my subject, I put up my backgrounds and filling glasses with water. I also laid some of the backgrounds flat and used them as a base; the patterns then reflected on top of the water.
My camera settings (Nikon D800E) ISO 640, f/14 – 16, shutter speed ranged from 1/5, 1/3, 1/13 sec depending on which background was being used.


This is a fun winter project as you do not need a lot of supplies, just clear glasses, vases, bowls, water (distilled is recommended because tap water bubbles), and paper or fabric with a design. You can make your own designs using Photoshop and printing the off of you printer.


Have fun experimenting!
Nature’s Imperfections

When photographing nature we encounter imperfect subjects. It takes a little patience and imagination to make corrections to an image after it’s captured.
While looking through images that were photographed this summer, this one was intriguing. The bug on the coneflower was lost in the shadows and was very much in focus.

Bug lost in the shadows
The shadow slider in Lightroom opened the area and other adjustments were made to the image. Then the gap on the left kept screaming! Cropping did not help, so the image was edited in Photoshop (Photoshop is used as a plug-in to Lightroom). The magic brush tool was used to capture a piece of the adjacent area and a layer was created of that selection. The petal was turned and transformed, then a layer mask was applied so the petal could be blended in with the rest of the flower.

A petal was added to the left to fill the gap
Then the space on the right was an attention grabber. The same technique was applied. After the second petal was added the image was saved in Lightroom and the radial filter and adjustment brush was used to make sure the bug was the central focus of the image.

The gap on the right was filled with data captured from the adjacent area
Nature is imperfect and as the old margarine commercial says, “It’s not nice to fool Mother Nature!” there are those who believe that you capture the image “as is” and make no changes. Making changes to an image that is imperfect has it’s merit. The photographer has to make the decision if the risk of “fooling Mother Nature” is worth taking!
Creativity: Where does it start?

We are all familiar with the chicken and egg concept…which came first? In photography we are faced with a similar dilemma, do our creative ideas come when the photograph is taken or afterwards in post-processing?
There are times when an image is photographed with an end result in mind. Then there are times during post-processing when an idea emerges on how to create a special image.
Take this palm leaf for example:
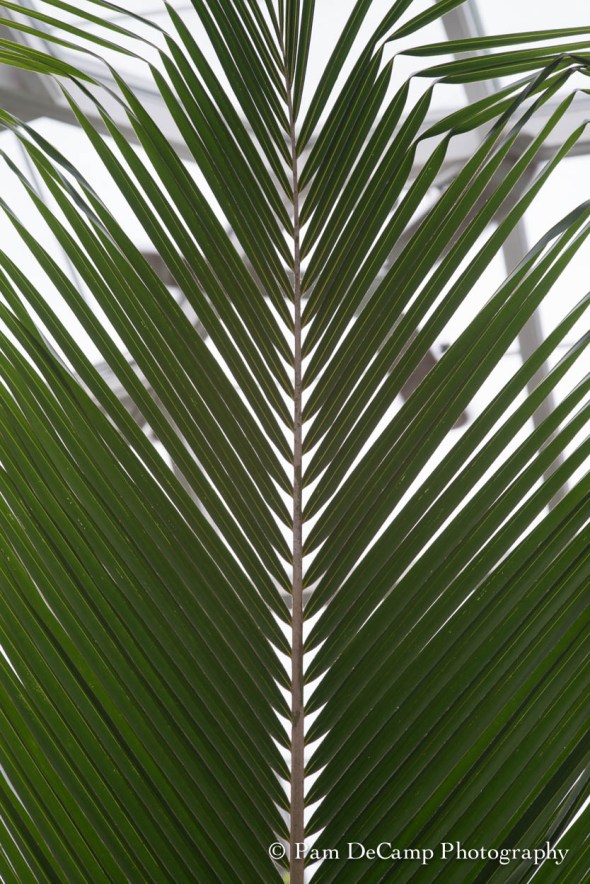
Palm leaf as shot
It is a nice image, but it is not “special”. How about if the perspective is changed?

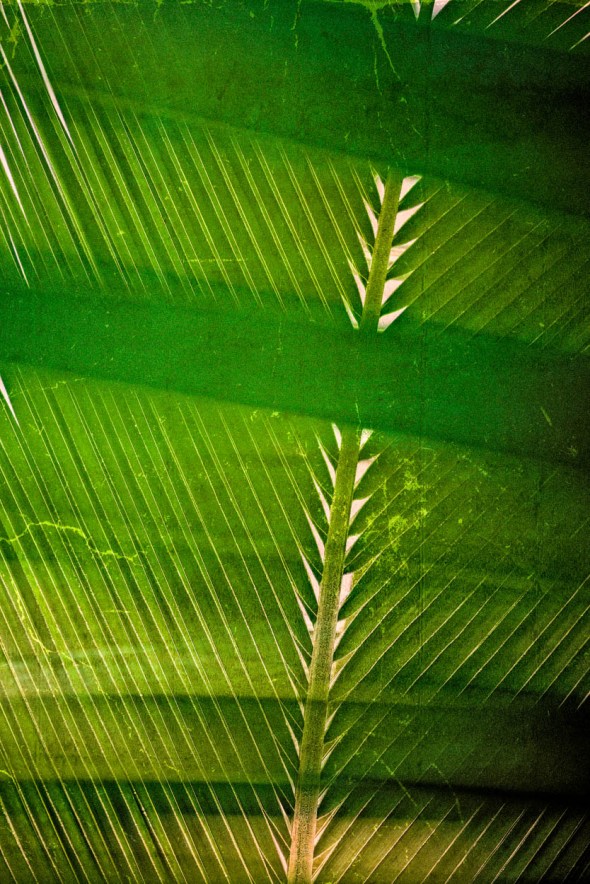
Changing the perspective of an image can give more interest
A diagonal line forces the eye to move up through the photograph. While it is an acceptable image, what else can be done to make it more interesting?

Colorization and the addition of textures
By changing the color and adding textures to the image it changed the look all the way around. A tilt-shift was added on a diagonal to give a soft blur to the edges. On1 Effects is an easy way to make these changes. After the changes were made and tweaked, the images were then saved back into Lightroom.

After a few changes in Lightroom
Once the image was imported back into Lightroom, the Trey Ratcliff HDR Romance Soft pre-set was applied and the image was cropped.
Using Lightroom and On1 together is simple. If On1 is set up as a plug-in program to Lightroom, you right click on your image and choose <Edit in> and select the module you need. It will save a copy in Lightroom with your initial edits and then when you are finished in On1 it will save those changes in Lightroom so you can make additional edits if necessary.
Enjoy being creative!

My Favorite Images of 2015: Macro/Close-up

Happy New Year to all! Each new year brings hope and the prospect of new opportunities for us to pursue.
On April 23, I will host my first Spring Flower Workshop. You will notice that I do not always use a macro lens to capture a nice sharp close-up. A good zoom lens (like the one your received if you purchased a kit) will give you the range you need to create wonderful close-up images. If your zoom says “macro” on it, you will be able to get a little closer than you would with a regular zoom lens. It is not a 1:1 macro, but you should be able to get close enough to capture many of the small details in your image. I wanted to share some of my macro/close-up images from 2015 to inspire you to get out and explore your surroundings!


This first group of images was taken in Colorado at Garden of the Gods. I saw this as the life span of a thistle. Through the series you can see how it changes over time. These were taken with my Tamron 24 – 75mm f/2.8. I often use it as a carry around lens and it has great close-up capabilities. I love how it blurs the background, but keeps the main image sharp.

White Trillium
This image will always be special to me. It was taken at the Shoot the Hills weekend photography competition. You are not able to edit your images and you have to choose your best image in each category (approximately 6 images) and turn those in to the judges. The white trillium was taken with my Sigma 105mm Macro lens using the ring flash. This was my first time participating in the competition; the image won an honorable mention in the Flora Category.

Here Kitty!
While not a flower; this cat is a nice example of a close-up image. Eyes are in focus and looking straight into the camera! I had put my camera on the ground and “hoped” it would focus on the right area. Again, this was taken with my Tamron 24 – 75mm f/2.8.
Intersecting Lines
I enjoy experimenting with textures and other processing techniques. I try to look for interesting forms and shapes in my surroundings. This was taken at the Huntington Museum of Art Conservatory. It is a wonderful place to take photographs. Most of the time is is not crowded and it is great to go to on a cold day. The palm branch was processed using the On1 Photo system.

Follow the Line
I also look for leading lines. The vine entwined itself along the branch of this plant. There is a nice curve for the eye to follow.

Young Coneflower
Young Coneflower was an image I enjoyed experimenting with. I had photographed the coneflower in front as it developed over several days. I wanted a nice linen texture and painterly feel. I used a combination of Oil Paint filter in Photoshop and did texture layering using On1 Photo. I had it printed on metallic paper with a linen texture. It does have the look and feel of a painting.
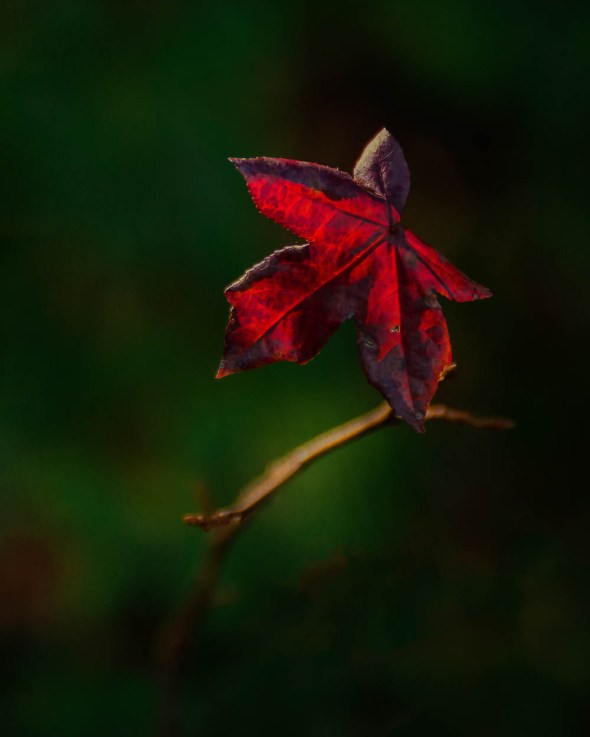
All Alone
This was taken in North Carolina at Thanksgiving. I saw the “lone” leaf sticking up off of a branch in the woods. This was photographed with my Sigma 120 – 300mm f2.8. The image was processed in Lightroom.

Purple Basil
In my opinion, I saved the best for last! My image, Purple Basil, was captured with the LensBaby Spark. The Spark comes with multiple disks that you can insert to create interesting shapes out of light. I did very little processing to this image; just basic adjustments using Lightroom. The morning sun was hitting the leaf just right. I had only a couple of minutes to photograph the leaf and the light was gone! I print this image on metallic paper and also have had a metal print created. The highly saturated colors pop on the metallic mediums. It won an Honorable Mention at the Foothills Competition in the fall.
I hope you have enjoyed the 2015 recap of my favorite images! I look forward to sharing more information in 2016!
Watch for notices of my classes and workshops for the upcoming year!

