Old Country Store, Jackson, Tennessee

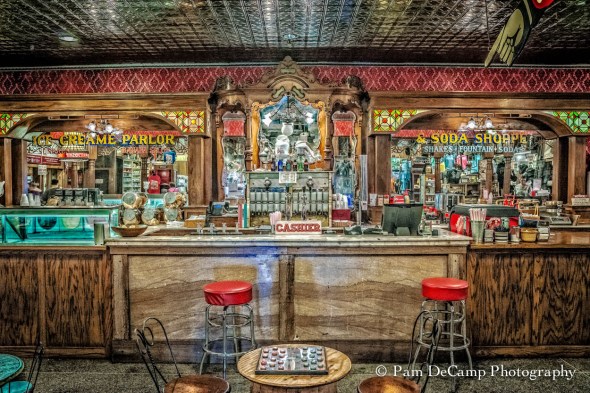
Ice Cream Parlor at the Old Country Store in Jackson, Tennessee
Every so often I browse through my images and something catches my eye. I look at it and think, “What can I do with this?” Images like this have so much detail and I like converting that detail into an HDR-like image. I started out by making a few adjustments to the shadows and highlights in Lightroom. I then moved the image over to On1 Effects to do the rest. I used the Amazing Detail Finder, Clarity, I lightened the shadows, Exaggerated the tones and edges, and added a subtle HDR look to the image. I moved it back into Lightroom to adjust the contrast slightly for my finished product.
See the before and after side by side:


Never give up on images you may have in your files. I hear people all of the time say they delete pictures. While I have many, many images I will never process, occasionally I find one that surprises me!
After posting this blog, it was suggested to me to see what the image looked like in black and white. Here is the result:

Black and White Version of the Ice Cream Parlor

Creativity: Where does it start?

We are all familiar with the chicken and egg concept…which came first? In photography we are faced with a similar dilemma, do our creative ideas come when the photograph is taken or afterwards in post-processing?
There are times when an image is photographed with an end result in mind. Then there are times during post-processing when an idea emerges on how to create a special image.
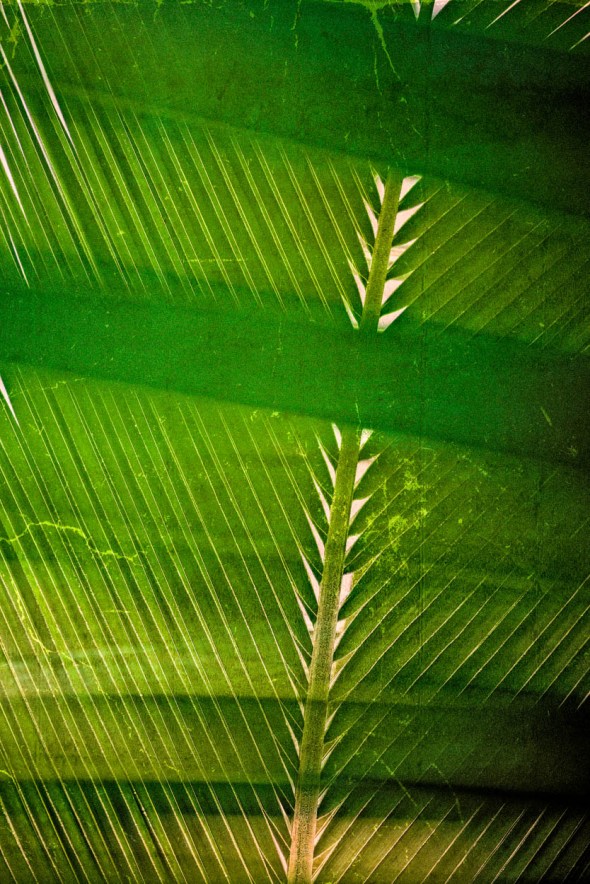
Take this palm leaf for example:
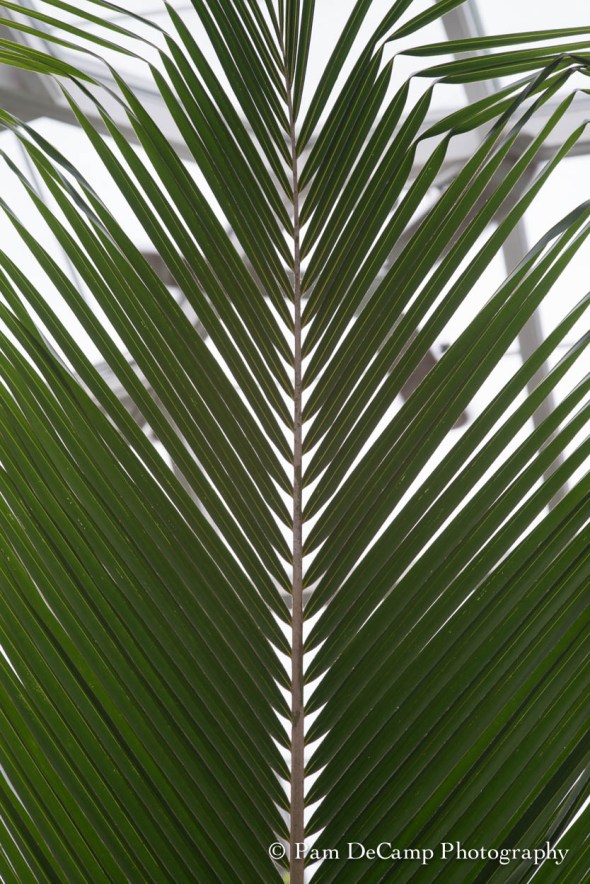
Palm leaf as shot
It is a nice image, but it is not “special”. How about if the perspective is changed?

Changing the perspective of an image can give more interest
A diagonal line forces the eye to move up through the photograph. While it is an acceptable image, what else can be done to make it more interesting?

Colorization and the addition of textures
By changing the color and adding textures to the image it changed the look all the way around. A tilt-shift was added on a diagonal to give a soft blur to the edges. On1 Effects is an easy way to make these changes. After the changes were made and tweaked, the images were then saved back into Lightroom.

After a few changes in Lightroom
Once the image was imported back into Lightroom, the Trey Ratcliff HDR Romance Soft pre-set was applied and the image was cropped.
Using Lightroom and On1 together is simple. If On1 is set up as a plug-in program to Lightroom, you right click on your image and choose <Edit in> and select the module you need. It will save a copy in Lightroom with your initial edits and then when you are finished in On1 it will save those changes in Lightroom so you can make additional edits if necessary.
Enjoy being creative!

My Favorite Images of 2015: Macro/Close-up

Happy New Year to all! Each new year brings hope and the prospect of new opportunities for us to pursue.
On April 23, I will host my first Spring Flower Workshop. You will notice that I do not always use a macro lens to capture a nice sharp close-up. A good zoom lens (like the one your received if you purchased a kit) will give you the range you need to create wonderful close-up images. If your zoom says “macro” on it, you will be able to get a little closer than you would with a regular zoom lens. It is not a 1:1 macro, but you should be able to get close enough to capture many of the small details in your image. I wanted to share some of my macro/close-up images from 2015 to inspire you to get out and explore your surroundings!


This first group of images was taken in Colorado at Garden of the Gods. I saw this as the life span of a thistle. Through the series you can see how it changes over time. These were taken with my Tamron 24 – 75mm f/2.8. I often use it as a carry around lens and it has great close-up capabilities. I love how it blurs the background, but keeps the main image sharp.

White Trillium
This image will always be special to me. It was taken at the Shoot the Hills weekend photography competition. You are not able to edit your images and you have to choose your best image in each category (approximately 6 images) and turn those in to the judges. The white trillium was taken with my Sigma 105mm Macro lens using the ring flash. This was my first time participating in the competition; the image won an honorable mention in the Flora Category.
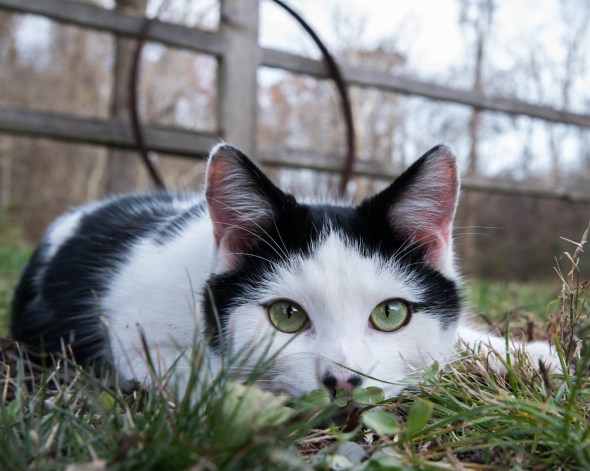
Here Kitty!
While not a flower; this cat is a nice example of a close-up image. Eyes are in focus and looking straight into the camera! I had put my camera on the ground and “hoped” it would focus on the right area. Again, this was taken with my Tamron 24 – 75mm f/2.8.
Intersecting Lines
I enjoy experimenting with textures and other processing techniques. I try to look for interesting forms and shapes in my surroundings. This was taken at the Huntington Museum of Art Conservatory. It is a wonderful place to take photographs. Most of the time is is not crowded and it is great to go to on a cold day. The palm branch was processed using the On1 Photo system.

Follow the Line
I also look for leading lines. The vine entwined itself along the branch of this plant. There is a nice curve for the eye to follow.

Young Coneflower
Young Coneflower was an image I enjoyed experimenting with. I had photographed the coneflower in front as it developed over several days. I wanted a nice linen texture and painterly feel. I used a combination of Oil Paint filter in Photoshop and did texture layering using On1 Photo. I had it printed on metallic paper with a linen texture. It does have the look and feel of a painting.
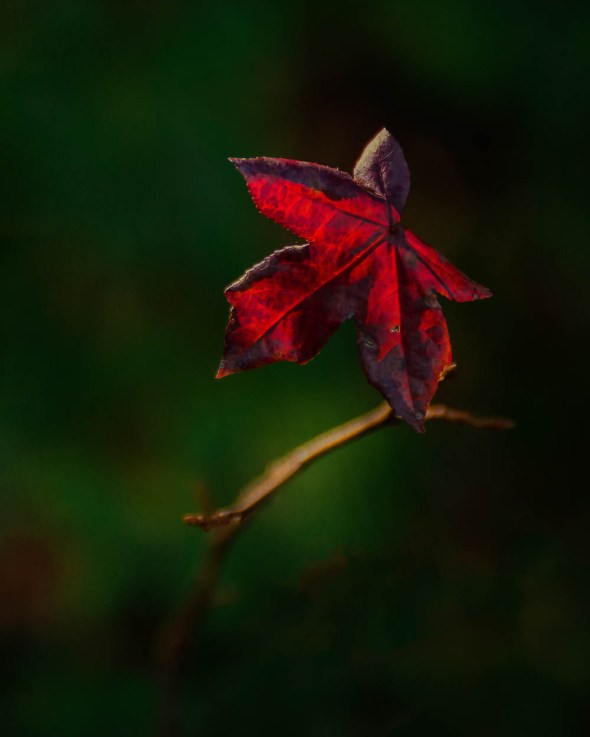
All Alone
This was taken in North Carolina at Thanksgiving. I saw the “lone” leaf sticking up off of a branch in the woods. This was photographed with my Sigma 120 – 300mm f2.8. The image was processed in Lightroom.

Purple Basil
In my opinion, I saved the best for last! My image, Purple Basil, was captured with the LensBaby Spark. The Spark comes with multiple disks that you can insert to create interesting shapes out of light. I did very little processing to this image; just basic adjustments using Lightroom. The morning sun was hitting the leaf just right. I had only a couple of minutes to photograph the leaf and the light was gone! I print this image on metallic paper and also have had a metal print created. The highly saturated colors pop on the metallic mediums. It won an Honorable Mention at the Foothills Competition in the fall.
I hope you have enjoyed the 2015 recap of my favorite images! I look forward to sharing more information in 2016!
Watch for notices of my classes and workshops for the upcoming year!

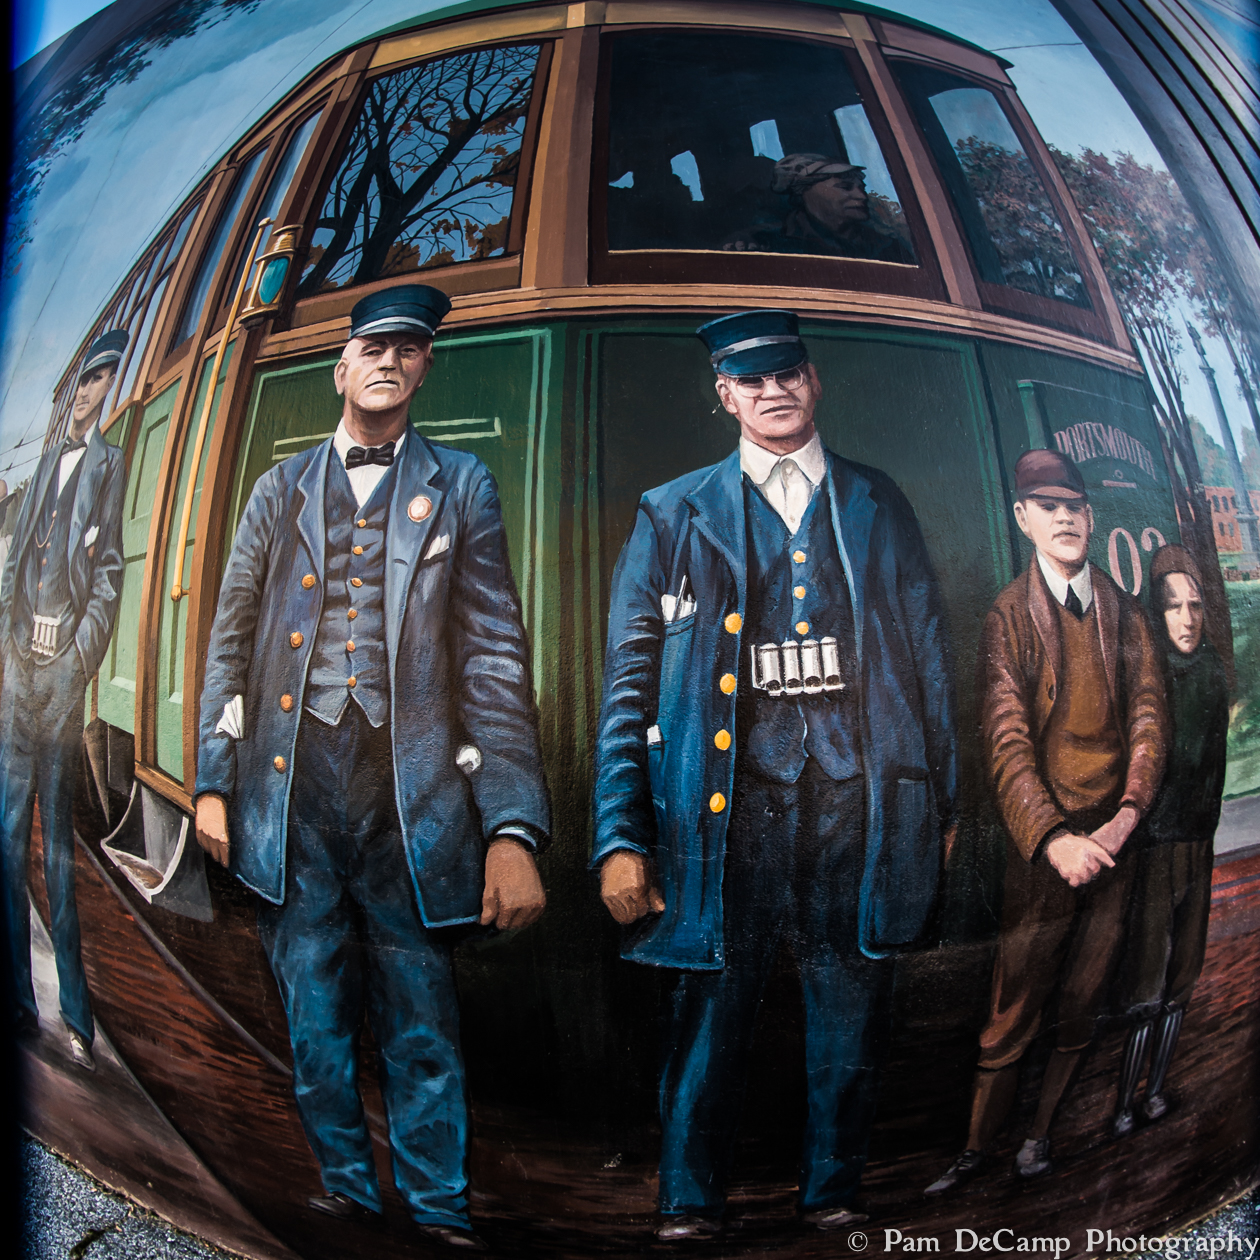
Portsmouth Murals: A Different Perspective


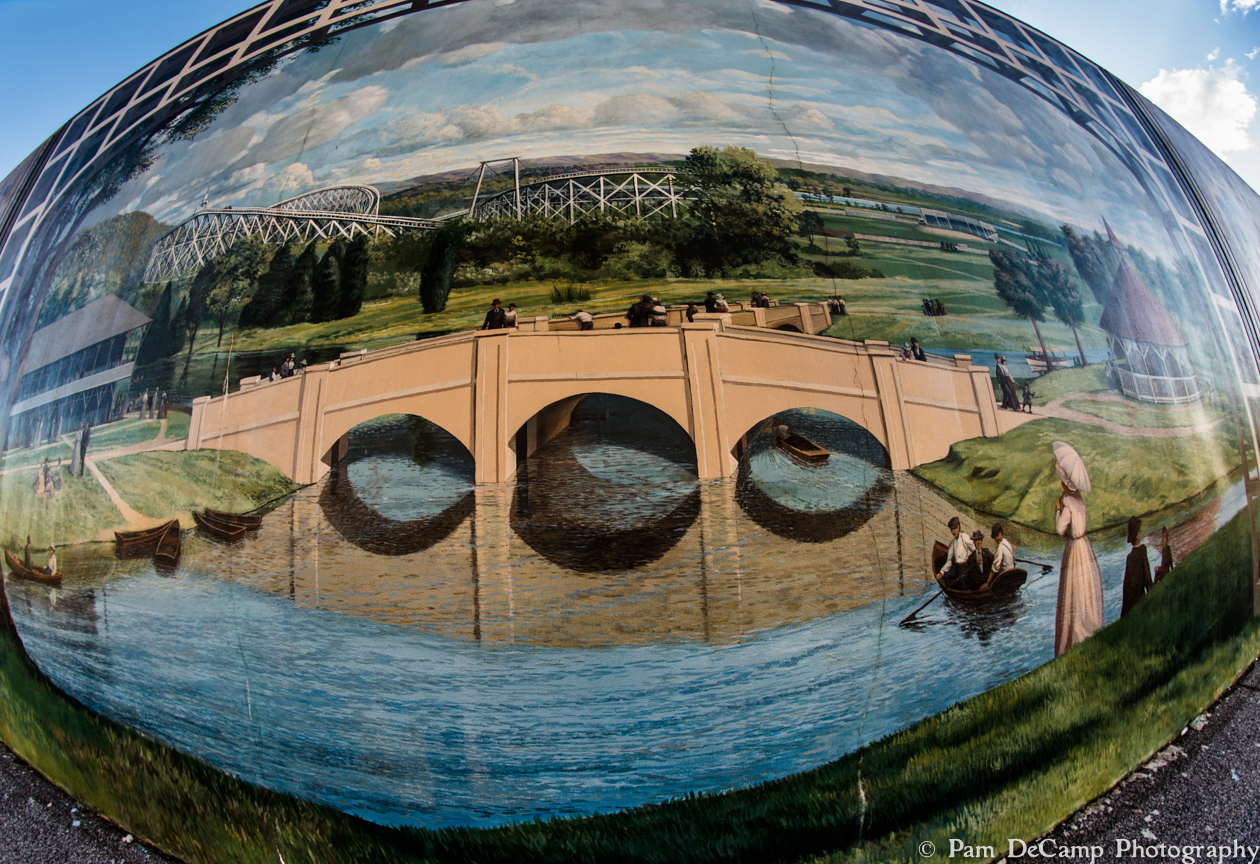 A few evenings ago I took a walk along the Portsmouth Murals. I just purchased a fisheye lens and thought I would experiment with the lens distortion. I like the 3D quality of the lens; it also makes for a cool “snow globe” effect. The shoe factory buildings stood out and appeared to be coming out of the wall! I stood against the mural with the motorcycle and moved the camera around to create just the right curve; the motorcycle looks like it is coming right off the wall! I had always enjoyed looking at images taken with a fisheye lens, but never really thought about purchasing one myself. I have played around with other images using the fisheye; it is definitely something to get used to and will work well on some subjects, but not necessarily on others.
I like the look of the mural images. Cropping a fisheye image is best done unconstrained; meaning adjust the crop manually vs a fixed dimension. Thank you for looking and I look forward to sharing more creative images in the near future!